CLICK HERE FOR FREE BLOG LAYOUTS, LINK BUTTONS AND MORE! »

9.30.2012

You can be a good neighbor only if you have good neighbors

  So I was in a bit of a bind today, and I had to get creative.  I was looking for the best way to say "Sorry my dog broke your gargoyle statue, but thank you for not making us pay for it" to our neighbor down the way.  The incident happened yesterday, and since they were not home I left a note in their mailbox explaining that our dog ran up to say hi to the mail lady and knocked over their Halloween decoration in the process.  I left them my number and offered to pay to have it replaced.  I was nervous, to say the least.  We just moved to this neighborhood about a year ago, and we had yet to really meet this family.

  Well, the lady who called me last night was super nice and understanding, and she said not to worry about a thing.  She was just thankful that I let her know what happened to it.  I was extremely relieved that she was so easy-going!  So I decided to bake her family a little something to say sorry and thank them for being so nice about it.

  This was my perfect opportunity to try out a new fall recipe: Mini Pumpkin Loaves with Pumpkin Cream Cheese Frosting!


All you need is this...

For the loaves:
1 box Betty Crocker super moist yellow cake mix
15 oz can of pure pumpkin
2 tsp pumpkin pie spice
powdered sugar (optional)

For the frosting
8 oz Philadelphia cream cheese (preferably whipped)
1/2 cup canned pumpkin
1 tsp vanilla extract
1 tsp cinnamon
1 tsp pumpkin pie spice
5 Tbsp brown sugar


  Start by preheating the oven to 350°
Combine cake mix and pumpkin spice in mixing bowl
Add 15 oz can of pumpkin and mix for approx. 2 minutes
Cover mini loaf pan with cooking spray
Fill pan about 2/3 full for each loaf
**Try to smooth out the batter in the pan.  Every imperfection will remain in the loaf as it cooks**
Bake for 25-30 minutes, or until a toothpick goes through the loaves clean

For the frosting, combine cream cheese, canned pumpkin, vanilla extract, pumpkin pie spice, cinnamon and brown sugar in a medium bowl and mix until smooth
**I will say that I like using the whipped Philadelphia cream cheese because it is easier to mix**
***Also, to avoid a large mess, spray your measuring cups with some cooking spray before measuring the pumpkin.  It makes things soo much easier!!***

  Once the loaves are cooked and cool, use a sifter to sprinkle powdered sugar lightly on top.  You can pipe or spread the cream cheese onto the loaves.  I chose to keep it separate, just in case some of my neighbor's family preferred to eat it plain.

  For presentation purposes, I used a large veggie tray we had leftover from the football game yesterday.  And to hold the pumpkin cream cheese, I just cleaned out my Philadelphia container and put it in there!  Add a little tissue paper and curled ribbon, and you've got a cute container that you don't have to worry about getting back!

  The nice thing is that this made 8 loaves, so I got to give 4 to them and kept 4 to eat with my man when he got home from work.  Also, the leftover cream cheese frosting will be great to put on our bagels in the morning.  The neighbor seemed to be excited about them, and she was so nice she even let me tour her house so we could compare layouts since we have the same exterior!  All in all, I'd call that a pretty good end to the day.

9.11.2012

If you have knowledge, let others light their candles with it.


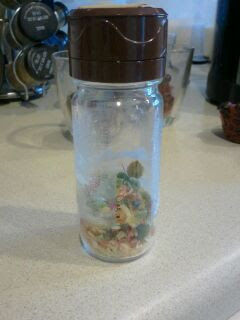
  So I know it's been a good while since I've posted anything.  It's been a busy week with work and getting things done around the home, so there hasn't been much time to get crafty.  I did, however, recently find time to use those wax shavings from my wine bottle centerpiece to create something to brighten up our home.  For storage purposes, I used an empty, glass pepper container from our kitchen.


  Before I begin this, I also have a confession to make.  I had what is fairly well-known as a "Pintrosity."  I saw this pin about putting coffee beans around tea lights to give your home a warm, fresh-brewed scent.  I didn't have any tea lights, but I did have some small votives and glasses that had been collecting dust from last Christmas.   So anyway, long story short, surrounding votives with coffee beans in a small glass just leads to a very strong burning smell in your home when the candle gets lower than the beans...

The idea
The Pintrosity
  Since clearly I would not be using the red votives anymore, I broke them up and removed the coffee beans so that I had more wax shavings to use for my project.

  I must give credit for this idea to Delightful Country Cookin'.  I, of course, ran into the link from Pinterest.  So here's what you need to create your own upcycled candle is the following:

Half gallon milk carton
Scissors
Candle wick and wick base
Colored wax shavings
White candle wax
Medium-sized pot of water
Wax boiling bags
Decorative candle holder or serving plate
Coffee beans (optional)
Candle scent oil (optional)

  To start, fill your medium pot with water and bring to a boil.  While you are waiting for your water to warm up, clean out your milk carton and dry it thoroughly.  Then, cut off the top of the carton, as shown below.


  Next, connect your wick and wick base by pinching the walls of the wick base around your wick.  Set the wick in your milk carton, and grab your boil bag.  I use Candle Magic brand bags that I bought from Michaels, but any boil bag will work.


  Now, get your white candle wax and place a small amount in your boil bag.  You will need just enough wax to create a small layer at the bottom of your carton so that the wick will stay put.  Again, I used Candle Magic brand wax crystals from Michaels.  If you have an old white candle you'd like to melt down and reuse, that would work as well.


  Once your water is boiling, tie your boil bag shut and set in the water.  After a few minutes, the wax should be completely melted down.


  Then, take the melted wax and pour it into your carton, around the candle wick.  I used a pair of kitchen scissors to hold my wick in place while the wax hardened.


  Once the wax at the bottom is hardened (should take only a few minutes), you can place your colored wax pieces into the carton.  These shavings can help further support your wick until you are ready to add the next layer of wax.


  Once you have the colored pieces arranged to your liking, you can place more white wax in your boil bag.  You'll need a larger amount of wax this time.  The amount will depend on how tall you would like your candle to be.  Once my wax was all the way melted, I added some cinnamon scent oil from Michaels to the liquid to give it something extra.  A few drops goes a long way, but if you like strongly scented candles you can add more oil.


  After your oil has been mixed into the still boiling wax, you may pour the white wax on top of your colored pieces.  Give the carton a good tap against your counter to make sure it gets between all of the chunks of wax at the bottom.  I again used the kitchen shears to hold my wick in place.


  Once the wax has been poured to your desired height, the waiting game begins.  I let my candle dry overnight (about six hours).  Feel the top of the candle to confirm that it has hardened enough before you begin removing it from the carton.  Once it is cooled down and hard, the easiest way to remove the candle is to simply tear the carton off of it.  I had no issues with the carton sticking to the candle, so it came off very easily.


  Now that the candle is removed, you can cut down your wick to the desired length, and there you have it- your very own milk carton candle!


  I used an old serving dish and the leftover coffee beans from my failed project to give it a little something extra (and also to cover up the worn, fading design on the plate).


  I set it up in the kitchen, and when Nick came home he was so excited that now he wants to learn how to make candles, too!